Making the switch to a wireless set-up for your projector has a lot of advantages. It means less fumbling with cables and is especially great if you like to use a lot of different media sources with your projector, saving you the time of unplugging wires every time you want to change from one source to another.
Setting up a wireless connection can sound like something that you need a lot of tech expertise to do, but the truth is it’s not hard at all to connect a tablet—or any device—to your projector wirelessly. Here are 4 easy steps you can follow to bring content from your tablet to the big screen without needing to use cords.
1: Get a HDMI wireless dongle.

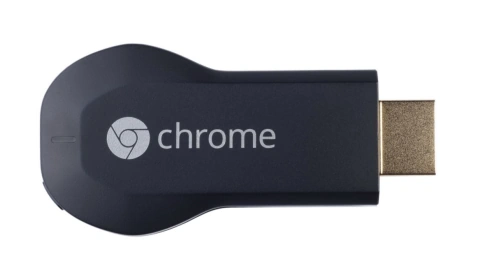
Wired projectors receive data through the ports on the device, and there’s no getting around that. You can eliminate the need for a cord, though, by using a dongle to receive data through the Miracast screen mirroring feature.
Our favorite is this Actiontec ScreenBeam Mini2 (>>> Check current price on Amazon). While it’s on the pricier side at $45, it’s reliable, has no lag time, and works with a wide variety of devices. If you’re looking for something on the cheaper side, check Tendak Gold-Plated Dongle (>>> Check current price on Amazon) which will also work with any tablet with miracast function.
There are two key things to look for as you’re shopping for dongles. First, that it supports your tablet and projector; second, that it supports the correct resolution. Most wireless dongles at this point max out at 1080p, but some will only send at 780p or lower resolutions that can make your picture grainy and pixelated. Lag time is something else to consider if you want to use the projector to play games or give presentations, though it will have less of an impact if you’re mostly using the tablet to send video content.
2: Plug the dongle into your projector’s HDMI port.
For the best results, turn off your projector before plugging in the HDMI dongle. In some cases, you may need to plug the dongle into an HDMI extension cable; if this is the case, one will typically come included and this step will be noted in the set-up instructions. Once it’s in the HDMI slot, turn the dongle on first, then power on the projector. This will avoid many issues of the projector not recognizing the dongle. Also, double-check that the signal source on your projector is set to the HDMI port where the dongle is plugged in.
3: Complete set-up by connecting to wi-fi or enabling mirroring.

The type of wireless dongle that you’re using will determine how much set-up you need to do from this point. If it communicates via wi-fi, make sure it’s connected to the same network as the tablet you’ll be using to send content. You may also have the option to give the dongle a unique name at this point. This is a good idea if you have a lot of devices in your home, making it easier to quickly find the one that you want.
4: Enable Miracast on your tablet and choose the projector as the receiver.
If you have an Android device (including Fire tablets), you’ll find the Miracast option under the “Display” area of the settings menu. For Apple devices, tap the “Enable wireless display” option from the Menu button. A list will pop up showing all available receivers in the area. Choose the dongle connected to the projector and whatever is on your tablet should mirror onto your projector.
And that’s all there is to it!
Turning your projector into a wireless projector is simple, even if you don’t have a lot of technical know-how. Eliminating cords is especially helpful if you use a ceiling-mounted projector and it can give you a lot more freedom in terms of how you set up your home theater. It can also make it a lot easier to switch between devices—just disable Miracast on your tablet and enable it on your phone or computer and the screen will switch over. If you’ve been putting off exploring a wireless projector because you think it will be tricky or expensive, we hope this how-to guide has inspired you to give it a try, and make your home theater that much easier to use.