Projectors, like any other devices, need regular maintenance for optimal functioning. Over time, the projector lens can accumulate dust, creating a murky cloud across your projected image, consequently reducing the image’s brightness and sharpness. Therefore, knowing how to clean a projector inside lens safely is essential for consistent high-quality projection.
This process not only ensures better image quality but also mitigates the need for more expensive repairs in the future. While the task of cleaning a projector lens may seem daunting, it is relatively quick, easy, and can notably extend the lifespan of both your lamp and the projector itself.
This article will provide you with a step-by-step guide on how to maintain and clean your projector lens effec
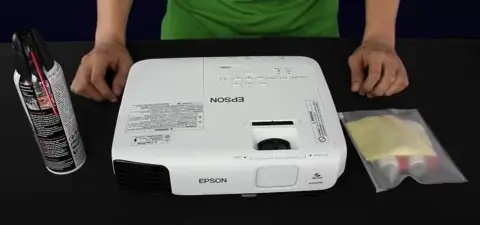
Necessary Tools for Cleaning a Projector Lens
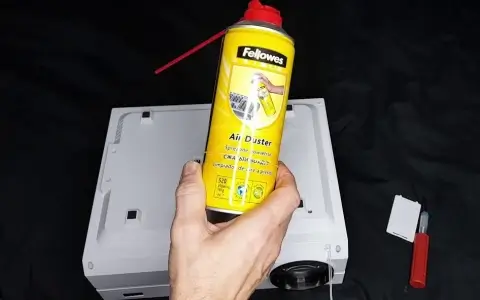
Before starting, make sure you have all the essential tools ready. For this task, you’ll need compressed air, a microfiber cloth or a lint free cloth, lens cleaning solution or lens cleaner, tissue or lens cleaning paper, a lens brush, and a manual lens blower.
Turning Off and Unplugging the Projector
The first step in the lens cleaning process is to ensure your safety. If you’ve been using your projector recently, turn it off and give it a few hours to cool down. The lens tends to get very hot after use, making it more brittle. A cool lens is less likely to break during the cleaning process.
Accessing the Projector’s Interior
Every projector model is different, so you will need to refer to your specific projector’s manual to find out how to safely open it. Usually, there is a latch or button on the projector housing that allows you to access the internal parts.

Utilizing Compressed Air to Clean the Inside of the Projector
Use compressed air to clean the internal parts of the projector. It would be best if you used short bursts, holding the can roughly 3-4 inches from your projector. This will help remove loose dust without causing damage. Move the nozzle around to target any visible dust. This process should be continued around the fan and throughout the housing to eliminate all dust from inside your projector.
Removing Dust Particles
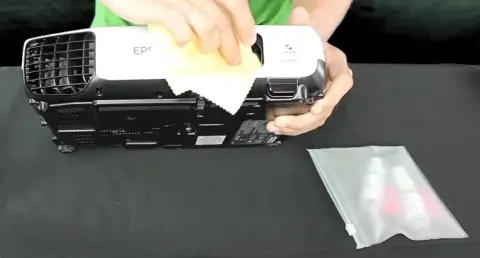
After using compressed air, you want to ensure that you’re not just blowing the dust back into your projector. Use a lint-free cloth or a microfiber cloth to gently wipe away any visible dirt or dust. This step should be executed before introducing any moisture into the cleaning process to avoid creating a muddy mess.
Cleaning the Projector Housing Exterior
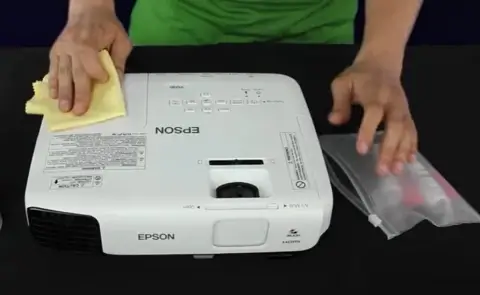
Next, clean the projector’s exterior housing. Use a moistened microfiber cloth to remove any remaining traces of dust and dirt. Do this after cleaning the inside, as dust sticks easily to moisture, and your projector can end up just as dirty as when you started. Pay particular attention to the fan vent and surrounding area, as these parts tend to accumulate a substantial amount of dust.
Applying Lens Cleaner and Cleaning the Projector Lens
With the rest of the projector now dust-free, you can proceed to clean the lens. First, remove the lens cap. Using lens cleaning paper or a tissue, apply a drop or two of the lens cleaner. Gently wipe the lens in a circular motion, ensuring you cover all areas.
 The lens cleaner typically dries quickly, so there’s no need to dry it manually. However, if you notice streaks or spots, you can use a lens brush or a manual lens blower to gently remove them without damaging the lens. Once you’re finished, replace the lens cap.
Precautions for a Dust-free Lens
Even the best-maintained projector will require regular cleaning. However, you can take steps to reduce the amount of dust that accumulates in and on your projector lens.
Keep the Fan Clean
The fan is a critical component of your projector’s system, as it helps alleviate the heat produced by the lamp. However, it’s also a major culprit for dust intake. Make it a habit to check the vent every time you turn on your projector. If you see accumulated dust, wipe it away with a damp cloth.
Use an Air Purifier
An air purifier can drastically reduce the amount of dust in the air, consequently lessening the amount of dust that can get into your projector. Positioning an air purifier close to the projector can serve as an extra line of defense, cleaning the air before it reaches the fan. (Some great options for air purifiers can be found on Amazon)
Cover the Lens When Not in Use
Both the outside and the inside of your lens are prone to dust accumulation. However, the outside is easier to protect. Make sure to replace the lens cap when you’re not using the projector. This simple step not only helps keep your lens clean but also protects it from potential damage.
REFERENCES AND FURTHER READING:
- If you’re looking for a gaming projector click here.
- Our top-of-the-best 4K projectors can be found here.