A golf simulator lets you work on your game no matter what the weather’s like outside and can be a fun way to unwind at the end of a stressful day. Many golf simulators are designed for gyms and professionals, though, and cost more than most people are willing (or able) to spend on a game.
The good news is, building your own golf simulator isn’t hard. Depending on what equipment you buy, you can do it on a budget of $1,500-$2,000—and sometimes even less, if you’re particularly frugal. If you’re wondering how to build a golf simulator at home, this step-by-step guide will walk you through it.
1) Measure the space where you’ll set it up.
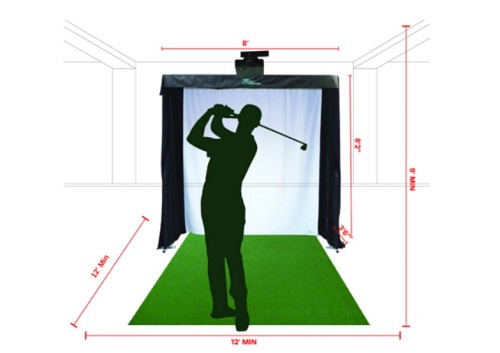
Before you buy any equipment, you should make sure you have a place to build the golf simulator. You’ll need a room that’s at least 10’ by 10’ with a ceiling height of at least 8.5’ to give you enough room for full, natural swings. A garage could be a great choice if you don’t mind giving up space for a car.
2) Buy your projector, launch monitor, and software.
The main thing you’ll need is something to track your shots. Stand-alone launch monitors like SkyTrak can be pricey, but they’re also more versatile and can be used to track your shots out on the course as well as in the simulator.
Some golf simulator software comes with accessories like the screen, monitor, and tee pad included, so it’s smart to choose your simulator first then decide what else you’ll need. Stand-alone simulator programs with no extras included are the cheapest option, costing around $200-$300 on average depending on the brand. A program like OptiShot 2 can be a good middle-ground option. It costs about $400 but comes with a sensor-equipped tee pad included.
The projector will be another significant portion of your budget. Expect to spend at least $500 on the low end, and something in the range of $1,500-$2,000 if you want a more sophisticated display with 4K realism. While the visual quality is important, you should also pay attention to the input lag. This tells you how much of a delay there will be between your swing and the ball’s motion on the screen. Look for an input lag of 60ms or less for the most realistic playing experience.
3) Install the screen and projector.
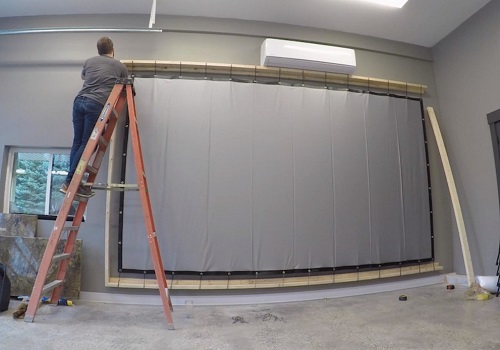
Leave at least 1 foot of distance behind the screen. This will prevent damage to the walls, first of all, but is also an important safety consideration. If the screen is too close to the wall, the ball could strike the surface and end up bouncing back your way. Portable aluminum-frame screens are a great choice since they’re heavier and more stable than screens suspended from the ceiling.
Once the screen is up, you can install your projector. The exact distance you’ll need depends on the size of the screen and the throw distance of the projector (you can find that info in the projector’s manual if you’re not sure). Ceiling mounting is often a good way to go, preventing your movements from interfering with the picture. Just make sure you place the tee pad far enough away from it that you’re not at risk of hitting your projector on your backswings.
4) Install the net and golf mat.
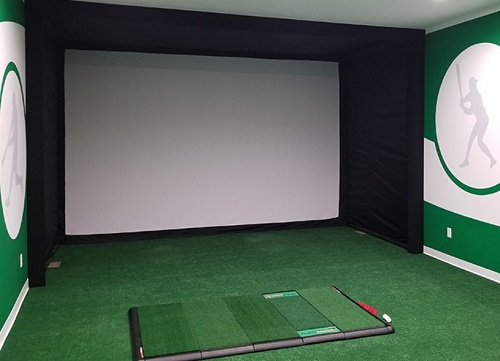
The most basic golf simulator set-ups have a small tee pad directly on the floor. If you want something more sophisticated, golf mats from TrueStrike use a silicon gel layer to simulate the feel of grass, and Fiberbuilt combo golf mats have a small putting green so you can also work on your short game.
Of all the equipment, the net is the easiest to choose. The main consideration is going to be the size. You want to make sure it’s wide enough to catch chipped shots and missed hits. There are also screens specifically designed for golf simulators that have the net built in, which is convenient but does limit the versatility of the separate components.
The Final Word
High-end all-inclusive golf simulators can cost as much as a new car (or more) but you don’t need that kind of budget to build one of your own. For the cheapest set-up you can even ditch the projector and simulator software, using just a tracking monitor and a net to catch your shots.
The most important thing is space if you need an indoor set-up. The more room you can leave around yourself when you’re swinging, the lower the chance you’ll end up damaging the walls (or yourself) while you’re playing.