A projector can take your gaming experience to the next level, especially for those who like to play split-screen co-op. While the specific steps can vary depending on your projector model, learning how to connect an Xbox One to a projector is fairly easy—once you know what steps to follow.
If you’re in the process of setting up an Xbox-based projector gaming system, read on below for a step by step guide. You’ll be up and running (and playing) in no time.
Step 1: Identify the projector’s connections
The Xbox one sends its video and audio signals through an HDMI out. There are two USB ports, but these are designed for connecting accessories, not sending information to a screen. In addition, it has an S/PDIF optical audio output, for sending an audio signal to a separate location than the video.
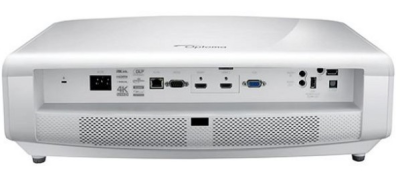
Different projectors offer different connection options. HDMI has become the standard, so most modern projectors will offer at least one HDMI port. Older projectors may instead have a VGA port, a DVI connection, or a composite video or S-Video connection.
USB ports are more and more common on projectors, but just like with the Xbox these are often for accessories, not video and audio signals. The exception is a USB-C connection, but this is newer technology and not as likely on a projector.
Step 2: Decide which connection you’ll use
If the projector has an HDMI port, this is by far the easiest option. If there is a USB-C port or VGA port, connecting is still pretty easy with the right adapter. Adapters exist to send HDMI to composite video or S-video connections, though they’re often less reliable, especially when it comes to sound.
Step 3: Get the right cables
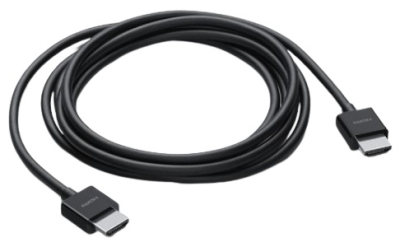
Again, this is easiest for HDMI: you can use the cable that came with your Xbox. If you need to purchase an adapter for a different connection style, your best bet is to check online. You can likely also find them at large electronics stores, which may be your best option if you’re not sure which connection to use. The techs will be able to steer you in the right direction.
Step 4: Connect and test
Plug everything in, turn on your projector and your Xbox One, and make sure you’re getting both sound and picture with no delay. If there are any issues, double-check all the connections, making sure the wires are fully pushed in on the ends.
What if I want to use external sound?
If your game using a headset, the speakers connected to your system aren’t a big concern. Otherwise, though, the built-in speakers on most projectors won’t cut it if you’re looking for an immersive sound experience.
If you only use your Xbox with the speakers and projector, you can connect both directly. Use the S/PDIF port for the speakers and the HDMI out for the video. An A/V receiver is your best bet if you’re connecting multiple components together. You can get a decent one for under $100 on Amazon. A receiver lets you hook your projector, speakers, cable box, game system, and anything else you want to use into one centralized device. This lets you switch seamlessly between them, without having to physically move wires from one device to another. Learn how to choose the best projector for simulators & gaming here.
Final Thoughts
Home theater equipment has been gradually shifting toward an HDMI standard. Even the Xbox One’s connections are proof of that. The first generation Xbox used a composite video connection, as did the Xbox 360. This means projectors that worked well with older-generation systems might not be as easy to connect to an Xbox One.
The newer your projector is, the fewer problems you’re likely to have. An A/V receiver can help alleviate compatibility issues, as well, since they’ll give you a variety of inputs and outputs. In most cases, though, you’ll be up and running once you follow the steps above.