One of the greatest aspects of owning a projector is its remarkable versatility when it comes to setting up your viewing environment. In fact, you don’t even necessarily need to project onto a traditional projector screen. If you’re pondering the question, “What can I use for a projector screen?” you’ve come to the right place. We’re about to dive into a list of DIY screen ideas, exploring cheap projector screen alternatives that could be the ideal choice for your home theater setup.
Option 1: Utilizing a Blank Wall
The simplest and most cost-effective alternative to a projector screen is to project straight onto a blank wall. This option, however, is not without its caveats. Solid white walls work best as any color or patterns on the wall will affect the image projected onto it.
Assessing Wall Texture
Additionally, the texture on the wall can influence how the image projects. Smoother is better. If the wall has a lot of texture, you may want to consider sanding it down before using it as a projector surface.
Advantages: No extra cost and no set-up time
Disadvantages: The picture quality won’t be as sharp or bright as with a traditional projector screen
Option 2: Harnessing the Versatility of a Clean Sheet
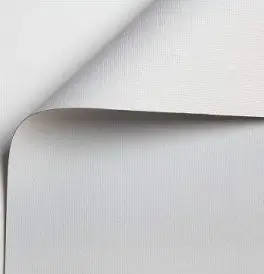
The idea of using a sheet as a cheap projector screen alternative is not new. Most people already have sheets in their home. If you don’t, buying one is considerably cheaper than purchasing a projector screen. Since you can hang a sheet anywhere, inside or out, it’s a more versatile option than a wall. Like with the blank wall, a plain white sheet works best. This doesn’t necessarily have to be a bedsheet; any piece of smooth, white cloth will do the trick.
Hanging Your DIY Projector Screen
The trickiest part of using a sheet as a projector screen is hanging it properly to avoid wrinkles, folds, or movement. Depending on the thread count of the sheet, you will likely also need to put something behind the screen, whether that’s a large piece of cardboard or a few extra layers of cloth, to prevent the light from shining right through.
>>You can also purchase special blackout cloth for projector screen on Amazon
Upgrading Your DIY Screen with Blackout Cloth
You can also purchase special blackout cloth for projector screens on Amazon, which can help increase the quality of your viewing experience.
Advantages: Affordable, easy to acquire, and can be used anywhere
Disadvantages: Picture won’t be as bright as with a traditional projector screen, and setup will require more effort
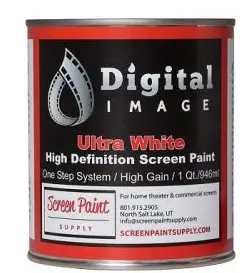
Option 3: Exploring the Potential of Projector Screen Paint
Projector screen paint, like this one from Screen Paint Supply (>>> Check current price on Amazon), enables you to convert any surface into a projector screen. This cheap projector screen alternative is more than just white paint. Surfaces treated with projector screen paint reflect light the same way a traditional screen does. This means you can use a blank wall without sacrificing picture quality. You can also use it to create a stand-alone screen by painting a sheet of plastic, particleboard, or cardboard.
Advantages and Disadvantages of Projector Screen Paint
Cost-wise, projector screen paint is about on par with buying a traditional projector screen. With projector screen paint, though, you’re not limited to the screen dimensions and styles you’ll find for sale, making it a superb option for custom projects. The flip-side of this is that you’ll have to spend a few hours painting before you start watching. Untreated surfaces will need a layer of primer as well as two coats of paint.
Advantages: Versatile, high picture quality
Disadvantages: Costs about the same as buying a traditional projector screen, requires the most initial set-up time
Option 4: Using Wrapping Paper as a Cheap Projector Screen Alternative
The blank, white side of a roll of wrapping paper can serve as an interesting and affordable custom projector screen. It has a smooth, glossy surface that reflects light well. Cut a piece of cardboard or particleboard to the size you want and tape sheets of white wrapping paper to it for a creative projector screen solution.
Handling and Storage of Your Wrapping Paper Screen
However, wrapping paper is not the sturdiest material. Any wrinkles or rips will be visible in your image. Unlike a traditional projector screen, you can’t easily roll it up to store it, and it’s not a great outdoor option, since moisture will quickly damage it.
Advantages: Low-cost way to achieve good picture quality
Disadvantages: Moderate set-up time, easily damaged, and difficult to store
Option 5: Roller Shades: A Two-in-One Solution
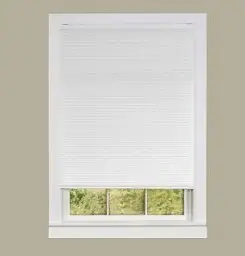
Roller shades can serve a dual purpose in your home theater, covering the windows to prevent light pollution and functioning as a projector screen. When shopping for roller shades, look for ones that are smooth and either white or pale gray in color. Make sure the screen is at least 6” bigger than the window on all sides to avoid light bleed around the edges.
Mounting Your Roller Shade Projector Screen
You don’t have to hang the blinds over a window, either. You can mount it on the wall wherever you want your screen. Roller blinds typically cost between $25 and $50, depending on the width and material. This means they’re a bit cheaper than traditional projector screens but need a bigger budget than most of the DIY options above.
Advantages: Good picture quality, can serve multiple purposes
Disadvantages: Not a big money saver
>>> Find some great options of roller shades on Amazon
So, What Can I Use for a Projector Screen?
The answer is quite a broad one, as long as the material is white and relatively smooth. The glossier the surface, the better it will reflect light. This is a key point to remember if you want to embark on a DIY projector screen project but still desire a clear, bright picture.
Deciding on the Best Projector Screen Alternative
Choosing a DIY projector screen really comes down to your motivation. If you’re looking to save money, your best bet is to repurpose something that’s already in your home, whether that’s a white sheet or a roll of unused wrapping paper.
However, if you’re going the DIY route because you desire a unique, custom screen, projector screen paint is the route you want to take. This versatile projector screen paint can turn virtually anything into a projector screen. It’s safe for both indoor and outdoor use, too, so you can use it for all your projector projects.
With all the innovative and cheap projector screen alternatives available, purchasing a traditional projector screen might seem mundane. Hopefully, one of the options above will fit perfectly into your home theater and make your movie nights even more enjoyable!