A projector-based home theater system is the best way to get a large-screen experience in your own home. While it’s not difficult to set it up, you do have to think about different things than you would if you were setting up a home theater based around a TV.
The good news is setting up a projector-based home theater is no more difficult than more traditional layouts, though it does need a bit more planning. You can’t expect to just take your projector out of the box and start watching movies like you would with a television.
The key is to put a bit of thought into your project before you start buying all of your equipment so you know the best places to spend your budget and how to make your space the best home theater it can be.
If you’re thinking about setting up your own home theater system with a projector, check out this step-by-step before you start shopping to save yourself some time and hassle. Not every perfect home theater will look the same, so don’t just try to emulate someone else’s space. It only takes a bit more thought to create one that’s truly your own.
1) Examine your space
It’s likely you’ll need to re-arrange some things when you switch from a television to a projector in your home theater. There are two things you’ll need to position before everything else: the screen you’ll be watching and the projector itself.
One of the biggest differences when you set up a projector-based home theater is the way you think about light. Consider your immobile light sources, like windows and permanent light fixtures. The less light pollution reaches the projector lamp and screen, the brighter and sharper your picture will be.
The second major difference is that you’re not locked into a single image size. Depending on how you set the lamp and the distance between lamp and screen, most projectors have a massive range of potential screen sizes, from as small as 30” to as large as 300”. The larger the screen, the more distance you’ll need between the lamp and the screen (try our throw distance calculator), and the more susceptible to light pollution the image will be. If you want a large screen in a narrower space, you’ll need to look for a short-throw projector, which often does mean spending a bit more money.
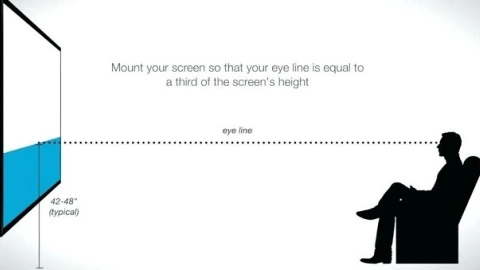
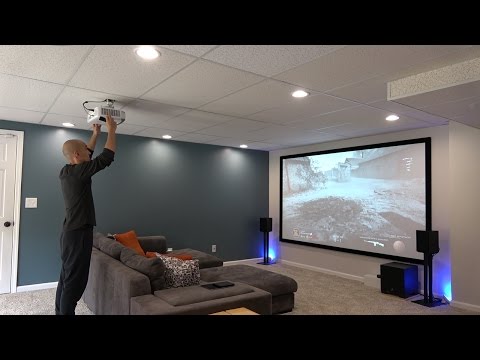
Finally, don’t forget to think about where you’ll sit. The light beam from the projector needs to be able to reach the screen unobstructed. If you want to position your couch between the projector and screen, think about how you’ll raise the projector beam over everyone’s heads. Ceiling-mounting is the most secure option for long-term installations, but you can also make smart use of tall shelves and other furniture.
2) Choose the right screen
In a pinch, you can project the image from a projector directly onto a wall, or hang a white bedsheet. If you’re setting up an entire home theater, though, it’s worth it to invest a portion of your budget into a high-quality screen. Our projector screen size calculator might be useful!
The importance of the screen to your viewing experience can not be understated. Few homes have many completely blank, white walls the size you’ll want for a projector screen. Many projector screens are also specifically designed to heighten contrast or otherwise improve image quality, which can be a big help in rooms with lots of ambient light or other constraints. Others have micro-perforations so you can put speakers behind the screen for true theater surround sound.
3) Determine how you’ll get your content
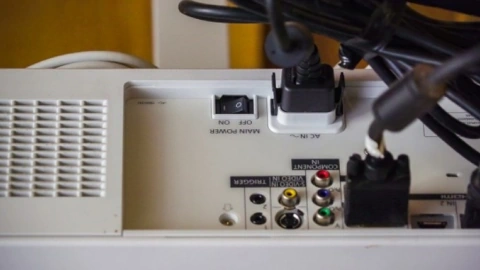
This is the part of your home theater that likely won’t change much when you change from a TV to a projector. The key is to buy a projector that’s compatible with how you want to watch shows and movies. If you mostly watch things through a streaming stick, gaming console, or set-top box, the standard HDMI input you’ll find on all home theater projectors will suit your needs. You won’t find options for VGA, MHL, or wireless streaming on all projectors, though, so make sure you check for that feature if you need it.
4) Explore your sound options
The speakers on most televisions are powerful enough to provide decent sound to the average living room. Projectors are smaller devices, though, and their little 10-watt speakers don’t have the same output. Compounding this problem is the fact that the heat lamps in projectors require fans to cool them, and these generate some noise of their own.
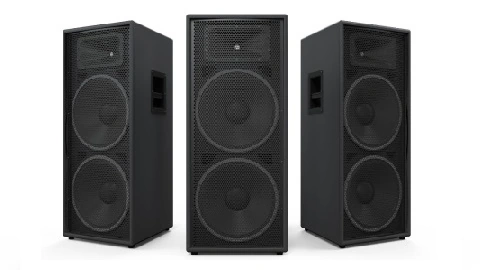
External speakers are optional for TV-based home theater systems but they’re necessary if you’re using a projector. If you already have one, just make sure whatever projector you buy is compatible. The majority of projectors will at least offer a 3.5mm audio out. If you have a spare HDMI port, you can also use it for a wireless adapter to connect your speakers via Bluetooth
5) Determine your budget and buy your equipment
List everything you need to buy to make your home theater happen. This tells you how many directions you’ll need to split your total budget. At the very least, you’ll need the projector and the screen. You may also need to buy a sound system and peripheral accessories, like a ceiling mount or extra cables.
The projector will likely be the bulk of your expense. They vary greatly price, from budget models costing just over a hundred bucks to full-featured 4K Ultra HD editions costing $2,000 or more. For most homes, a 1080p resolution projector in the $500-$1,000 range should suit your needs nicely.
Screens can cover the same price range, surprisingly. For most homes, a simple white screen that’s around 120” to 150” should be ideal, and you can find a decent one in the $50-$100 range. The only reason to spend more is if you want extra features, like a high-contrast screen or the option of behind-screen speakers.
The cost of your sound system is really at your discretion. If you’ve been happy with the sound you get from your television’s speakers, a simple 2.1 surround sound system (two bookshelf speakers and one subwoofer) should be just fine. You can find decent sets for as little as $50.
Finally, don’t forget about peripheral accessories like ceiling mounts and cables. These don’t add much expense individually; most ceiling mount systems cost around $25-$50. Remember that someone will need to install this equipment too, though. If you’re not a skilled DIY-er, this might be a project you want to outsource to a professional, especially if you want to run the wires through the walls or otherwise interact with your home’s electrical system.
6) Connect all the pieces
The question of whether or not you need professional installation is the big one when it comes to the set-up. If you’re not mounting the projector, you’ll have no problem doing it yourself. Even most mounting systems are simple enough to be accomplished by someone with minimal home repair and electronics experience.
Make sure you have everything you need purchased and ready to be assembled before you start. Everything will go a lot more smoothly if you have the proper cables, screws, and tools on-hand prior to digging into your project.
You also want to spend some quality time actually reading through your projector’s manual. Sometimes connecting things in a certain order can help make sure they all work correctly once you power on your system. This is especially important for ceiling-mounted systems since fiddling with them after they’re installed can be a hassle.
7) Set up the projector
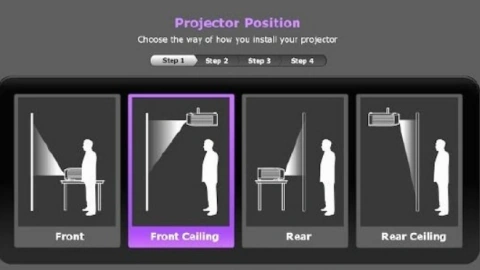
You will likely need to do some image alignment and adjustment to get the image from your projector to the right size and perfectly centered on the screen. If you’re mounting the projector, do this before you secure the hardware so you can make sure you’re putting it in the right place. Put the projector on top of a ladder to get it to the right height until you’re ready to make the placement permanent. If the projector’s location is fixed because of the constraints of your space, you could alternatively wait to permanently mount the screen, changing its placement to adjust the image size.
The kind of adjustments you can make to the image vary from projector to projector, and can include zoom, alignment, and inversion options. Many projectors offer keystone adjustment that let you position the projector at an angle to the screen without skewing the picture. If yours doesn’t, you’ll need to make sure the lens is directed head-on toward the screen.
Some projectors will have an on-board wizard that walks you through configuring your settings, sound, and picture. It may or may not be as easy as plugging everything into the right ports. If you get stuck or confused, you’re probably not the first one. There are tons of video tutorials out there that can help with the specific quirks of certain models or set-ups, and likely at least one will have the answer to your question.
8) Finish the installation
Permanently hang your screen, mount your projector if you’re going to, and find a long-term home for your speakers. Check there aren’t any cords or wires hanging loose from the ceiling, draped across walkways, or anywhere else they could become a hazard.
9) Check your sound and content sources
Before you call it a day, double-check that everything has been hooked up correctly. Finding and fixing any problems rights away is a lot less frustrating than finding out about them as you’re sitting down to watch your favorite show.
Play a quick game on your PlayStation, start a show on Netflix through your FireStick—whatever you’d normally do when you sit down to enjoy your projector. Test that both the sound and picture are working and that they’re in alignment on all input channels before you call it a day.
Sounds easy enough, right?
As we said, it’s not hard to set up a home theater with a projector. Even if you go for high-end equipment and professional installation, it’s the most affordable way to get a massive screen. Knowing what to expect going in, both in terms of cost and labor, will keep your home theater project from becoming overwhelming. Good luck bringing it all together!